
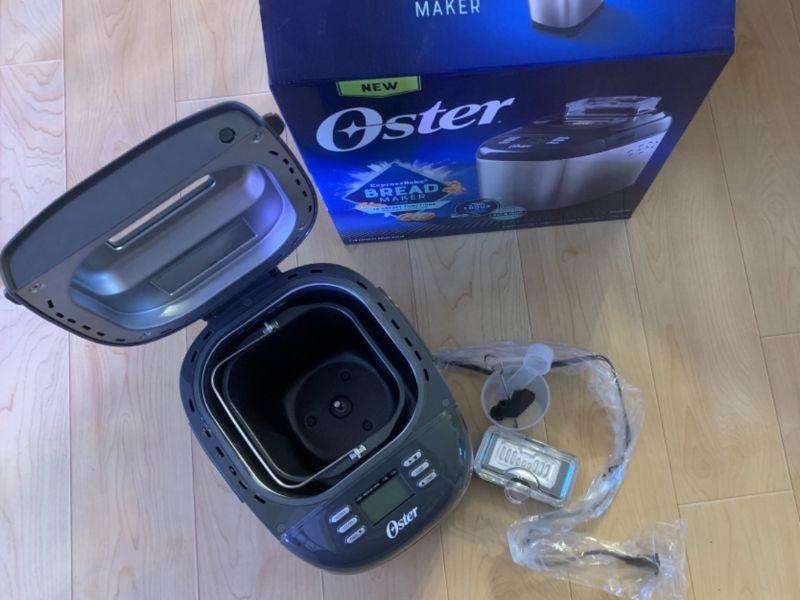
When I first bought the Oster bread maker, I wanted something simple that could save me time in the kitchen and help me stop relying on store-bought bread. I wasn’t looking for a professional, bakery-style machine.
I just wanted dependable homemade bread without having to knead, rise, or babysit dough. After using this machine almost every day for several weeks, testing different recipes, and learning what works and what doesn’t, here is my complete and honest Oster Bread Maker Review.
This review reflects what it’s actually like to use the machine consistently, not just for a few test loaves but for everyday bread making.
Oster Bread Maker Review Summary Table
| Feature / Aspect | Details / Experience |
|---|---|
| Brand & Model | Oster Bread Maker |
| Loaf Size | 1.5 or 2-pound vertical loaf |
| Pre-Programmed Settings | 12 settings including Basic, French, Whole Wheat, Sweet, Dough, Express Bake |
| Key Functions | Bake bread, dough, jam, yogurt (not tested), express bake |
| Delay Timer | Yes – allows you to set ingredients in advance for fresh bread later |
| Keep-Warm Function | Yes – keeps bread warm after baking |
| Bread Quality | Soft, tall, consistent; excellent for sandwich and everyday bread |
| Price | CHECK PRICE ON AMAZON |
1. First Impressions and Setup
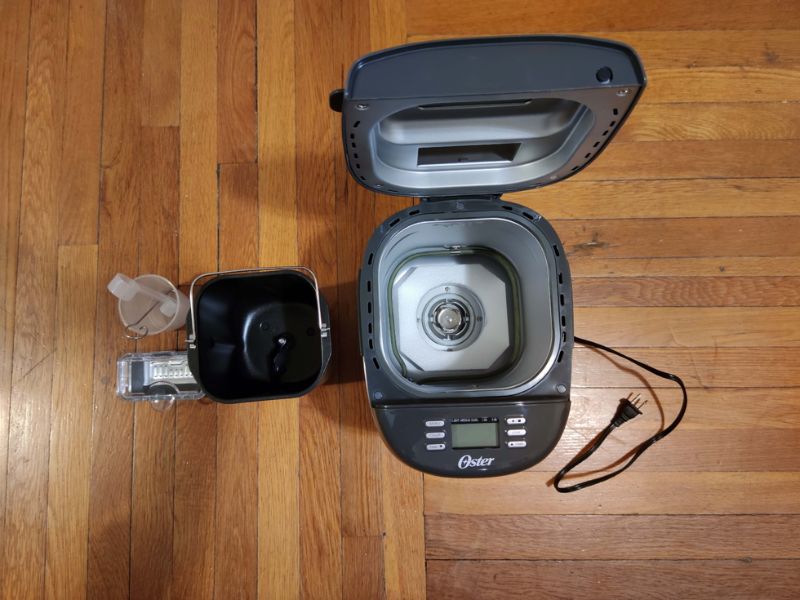
The first thing I noticed after unboxing the Oster bread maker was how light it felt. Some people prefer a heavier, sturdier feel, but I actually liked being able to move it easily.
It didn’t dominate my countertop, and I could store it away without effort.
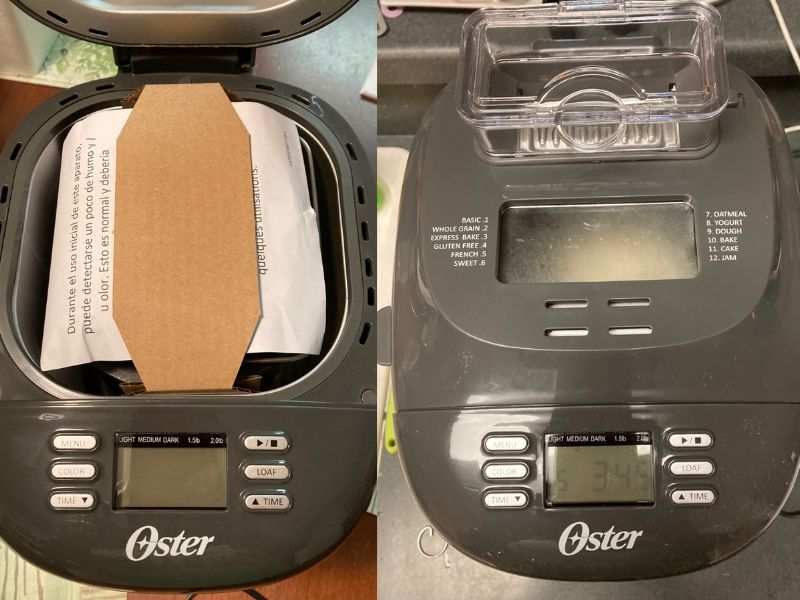
The design is simple and not overwhelming. The control buttons look basic, and although they took me a few minutes to understand, they are easy once you get used to them. The small display is clear enough for everyday use.
The manual could have been more detailed, but to be honest, most of what I learned came from using the machine and reading the recipe booklet.
The viewing window quickly became one of my favorite features. Watching the dough form during the first knead gave me a good sense of how much water or flour I needed to adjust.
I recommend checking the dough on your first few loaves to understand how the machine behaves in your kitchen environment.
2. Baking Performance: What My Loaves Actually Turned Out Like
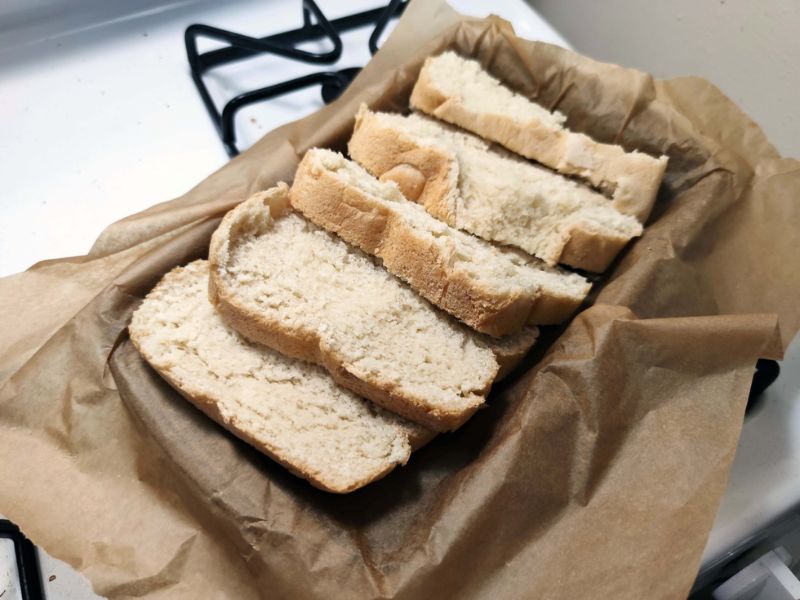
Basic White Bread
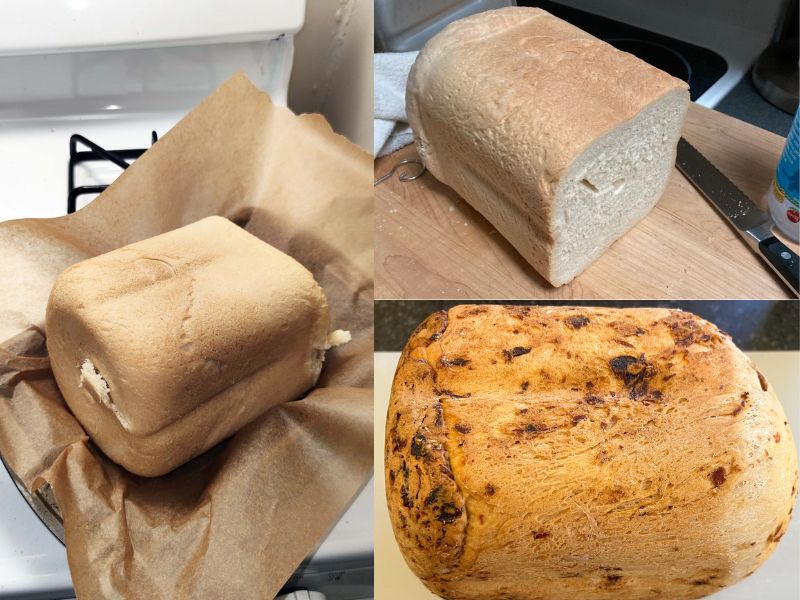
My very first loaf was the basic white bread. I used bread flour, measured everything with a scale, and selected medium crust. When I pulled the loaf out, I was genuinely surprised.
The bread rose tall, the top was smooth, and the texture was soft and fluffy. The crumb was light with a consistent structure.
The smell alone made the entire experience worth it. This became my “everyday loaf” because the results were so dependable.
French Bread
The French bread setting produced a slightly chewier texture, which I loved. The crust naturally came out a little firmer than the basic setting.
While it wasn’t like a rustic bakery loaf, it had enough structure to feel different from the basic white bread. I appreciated how the machine handled this dough type without collapsing or underkneading.
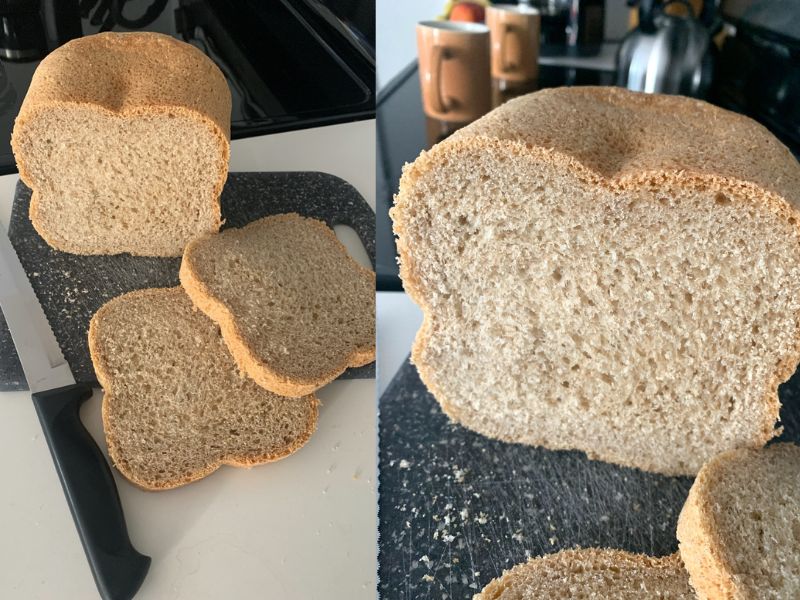
Whole Wheat Bread
Whole wheat bread took the most experimentation. My first loaf came out dense, which is typical for whole wheat in most bread makers.
The next time, I added two tablespoons of vital wheat gluten. That small change improved the rise, texture, and softness significantly.
Once I figured out the right balance of flour and moisture, whole wheat became a regular part of my baking rotation.
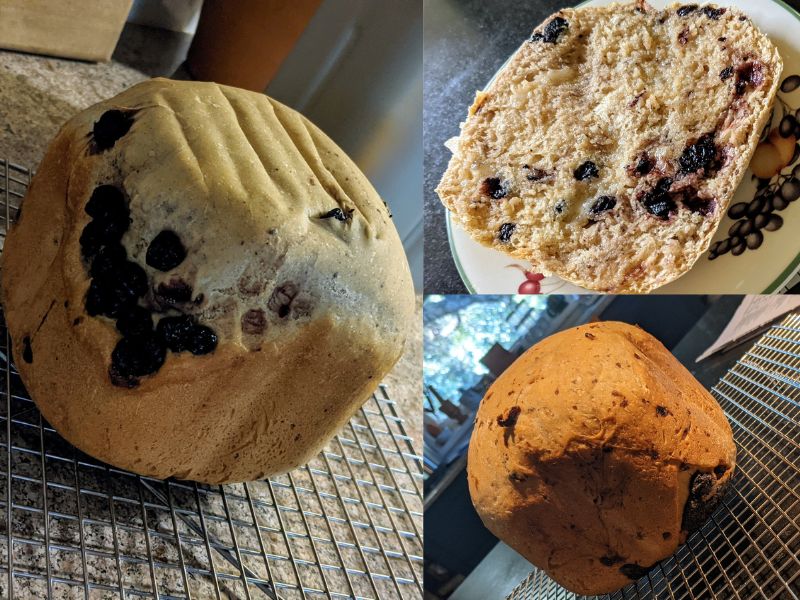
Sweet Bread and Raisin Bread
The sweet bread cycle produced moist, flavorful loaves with a nice even browning.
The machine’s raisin or nut signal worked reliably, so my cinnamon raisin bread had nicely distributed raisins rather than large clumps at the bottom. This cycle is excellent if you enjoy breakfast breads.
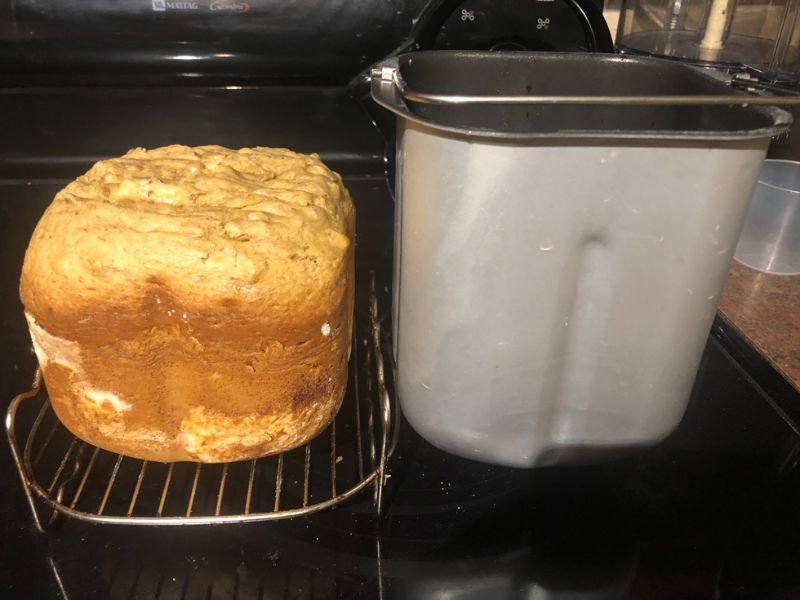
Dough Cycle
This is one of the strongest features of the Oster machine. The dough always came out smooth, elastic, and easy to shape.
I used it for pizza dough, dinner rolls, bao dough, and even cinnamon rolls. The consistent kneading and rising saved me a lot of time.
3. Key Features That Really Matter in Daily Use
- 12 Pre-Programmed Settings: The preset settings make the machine beginner-friendly. I used basic, French, sweet, whole wheat, dough, and express bake the most. Every button press feels straightforward once you understand the cycle numbers.
- 2-Pound Loaf Capacity: The machine can bake a full-size loaf, which is ideal if you have a family or bake bread weekly for meal prep.
- Delay Timer: The timer lets you prepare ingredients at night and wake up to warm bread in the morning. I didn’t think I would use this feature much, but I ended up using it more than expected.
- Keep-Warm Function: The bread stays warm after the baking cycle ends. It prevents the loaf from cooling too quickly, which I found useful on busy days.
- Non-Stick Pan: This makes cleanup unbelievably easy. Bread slides out with zero effort, and washing the pan takes less than a minute.
- Lightweight Build: Some people want heavier machines, but I liked how easy this one was to move. If you have limited counter space, this is a real advantage.
4. Pros and Cons Based on Real Experience
Pros
-
Produces consistently soft, well-risen loaves
-
Easy to use once you learn the cycle order
-
Works extremely well for white, sweet, and French bread
-
Reliable and versatile dough cycle
-
Very easy to clean
-
Delay timer is helpful for morning bread
-
Good value for the price
-
Light enough to move or store easily
-
Beginner-friendly
-
Makes a full 2-pound loaf that slices nicely
Cons
-
The manual could explain more
-
The recipe booklet sometimes needs adjustments
-
The kneading paddle leaves a hole at the bottom of the loaf
-
Whole wheat requires a bit of tweaking for best results
-
The exterior gets warm during baking
-
The machine is not designed for artisan-style crusts
None of these issues affected my overall satisfaction, and I found simple ways to work around all of them.
5. Tips I Learned From Trial and Error
These tips made a noticeable difference in my bread quality.
- Measure Flour by Weight: A kitchen scale made my loaves far more consistent. Bread flour can vary a lot when scooped, so weighing is more accurate.
- Check the Dough 5 Minutes Into Kneading
This is the most important habit.
- If the dough looks dry, add water one tablespoon at a time.
- If it looks sticky, add flour slowly.
This single adjustment solves most bread problems.
- Use Bread Flour Instead of All-Purpose: Bread flour produces taller, softer loaves.
- Add Ingredients in the Correct Order: Liquids first, dry ingredients second, yeast last. This prevents the yeast from activating too early.
- Use Room-Temperature Ingredients: Cold liquids slow down the rise.
- Remove the Paddle Before the Final Rise: If you want a smaller hole in the loaf, take out the paddle right after the last kneading cycle ends.
- Don’t Open the Lid During Baking: Opening the lid releases heat and can cause the loaf to sink.
Recommended Oster Bread Maker Recipes
| Recipe | Setting / Cycle | Ingredients Notes | Tips / Notes from Users |
|---|---|---|---|
| Basic White Bread | Basic #1 | 1 cup warm water, 1/4 cup vegetable oil, 1 tsp salt, 1 tbsp sugar, 3 cups bread flour, 1.5 tsp fast-acting yeast | Use bread flour for soft, tall loaves. Measure flour by weight. Medium crust works well. Perfect for sandwiches and toast. |
| French Bread | French Bread | Follow included recipe | Slightly chewier texture with firmer crust. Ensure dough consistency is right; adjust water/yeast if loaf is dense. |
| Whole Wheat Bread | Whole Wheat | Use bread flour + optional 1–2 tbsp vital wheat gluten | Dough may need slight adjustment. Check consistency during first knead. Soft, tall loaves with better elasticity using gluten. |
| Sweet Bread / Cinnamon Raisin | Sweet Bread / Raisin Bread | Sugar, cinnamon, raisins, or nuts | Add mix-ins at the beep signal to ensure even distribution. Great for breakfast or snack bread. |
| Dough (Pizza, Rolls, Buns) | Dough | Flour, water, yeast, optional sugar/salt | Dough comes out smooth and elastic. Shape and bake in oven. Adjust water/flour if dough is too sticky or dry. |
| Vanilla Cinnamon Pound Cake | Pound Cake | Flour, sugar, eggs, butter, milk, cinnamon, vanilla | Works well for small cakes. Be cautious with recipes above 3 cups of flour. Perfect for dessert or special occasions. |
6. Who This Oster Bread Maker Is Best For?
This bread maker is ideal for beginners, busy home cooks, families who want fresh bread every day, and anyone who wants reliable results at an affordable price. It produces soft, fluffy, consistent loaves that work great for sandwiches, toast, and meal prep.
People who prefer rustic, crackly artisan crusts or advanced custom settings may prefer a higher-end model, but for everyday home use, this machine offers excellent value.
7. Final Verdict: Is the Oster Bread Maker Worth It?
After weeks of using the Oster bread maker for all kinds of recipes, I can confidently say it is a dependable and practical choice. It may not have premium features, but it delivers the most important thing: consistently good bread with very little effort. The learning curve is small, the results are reliable, and the machine fits easily into a regular kitchen routine.
If you want an affordable bread maker that performs well, handles a variety of recipes, and makes fresh bread without hassle, the Oster bread maker is absolutely worth considering. It does exactly what it promises and ends up becoming part of your weekly, or even daily, kitchen habits.
Leave a Reply