
I bought the Bear Dough Maker after my old bread machine finally gave up on me. To be honest, when I looked back, I realized something important: I never actually used my bread machine to bake bread. I only ever used it to mix and proof dough, then shaped and baked everything in the oven. That made me start questioning why I was hauling out a bulky, heavy bread machine in the first place.
At the same time, my KitchenAid stand mixer—the professional model, no less—was starting to struggle with heavier doughs, especially whole wheat. It also took up a lot of space and was a pain to clean. I wanted something simpler, dedicated, and easier on my hands.
That’s how I ended up with the Bear Dough Maker. I’ve now been using it regularly for breads, rolls, pizza dough, dumplings, noodles, and even dessert doughs, and I can honestly say it has changed the way I bake.
Bear Dough Maker – Product Information (Quick View)
| Feature | Bear Dough Maker |
|---|---|
| Product Type | Dough mixer & fermenter |
| Baking Function | No |
| Bowl Material | Metal (non-coated) |
| Paddle Material | Stainless steel |
| Dough Capacity | Large (double batches) |
| Kneading Time | Adjustable |
| Proofing Function | Yes (adjustable) |
| Controls | Touch-sensitive |
| Noise Level | Moderate |
| Weight | Lightweight |
| Cleanup | Easy (hand wash) |
| Price | CHECK PRICE ON AMAZON |
My First Impressions Out of the Box
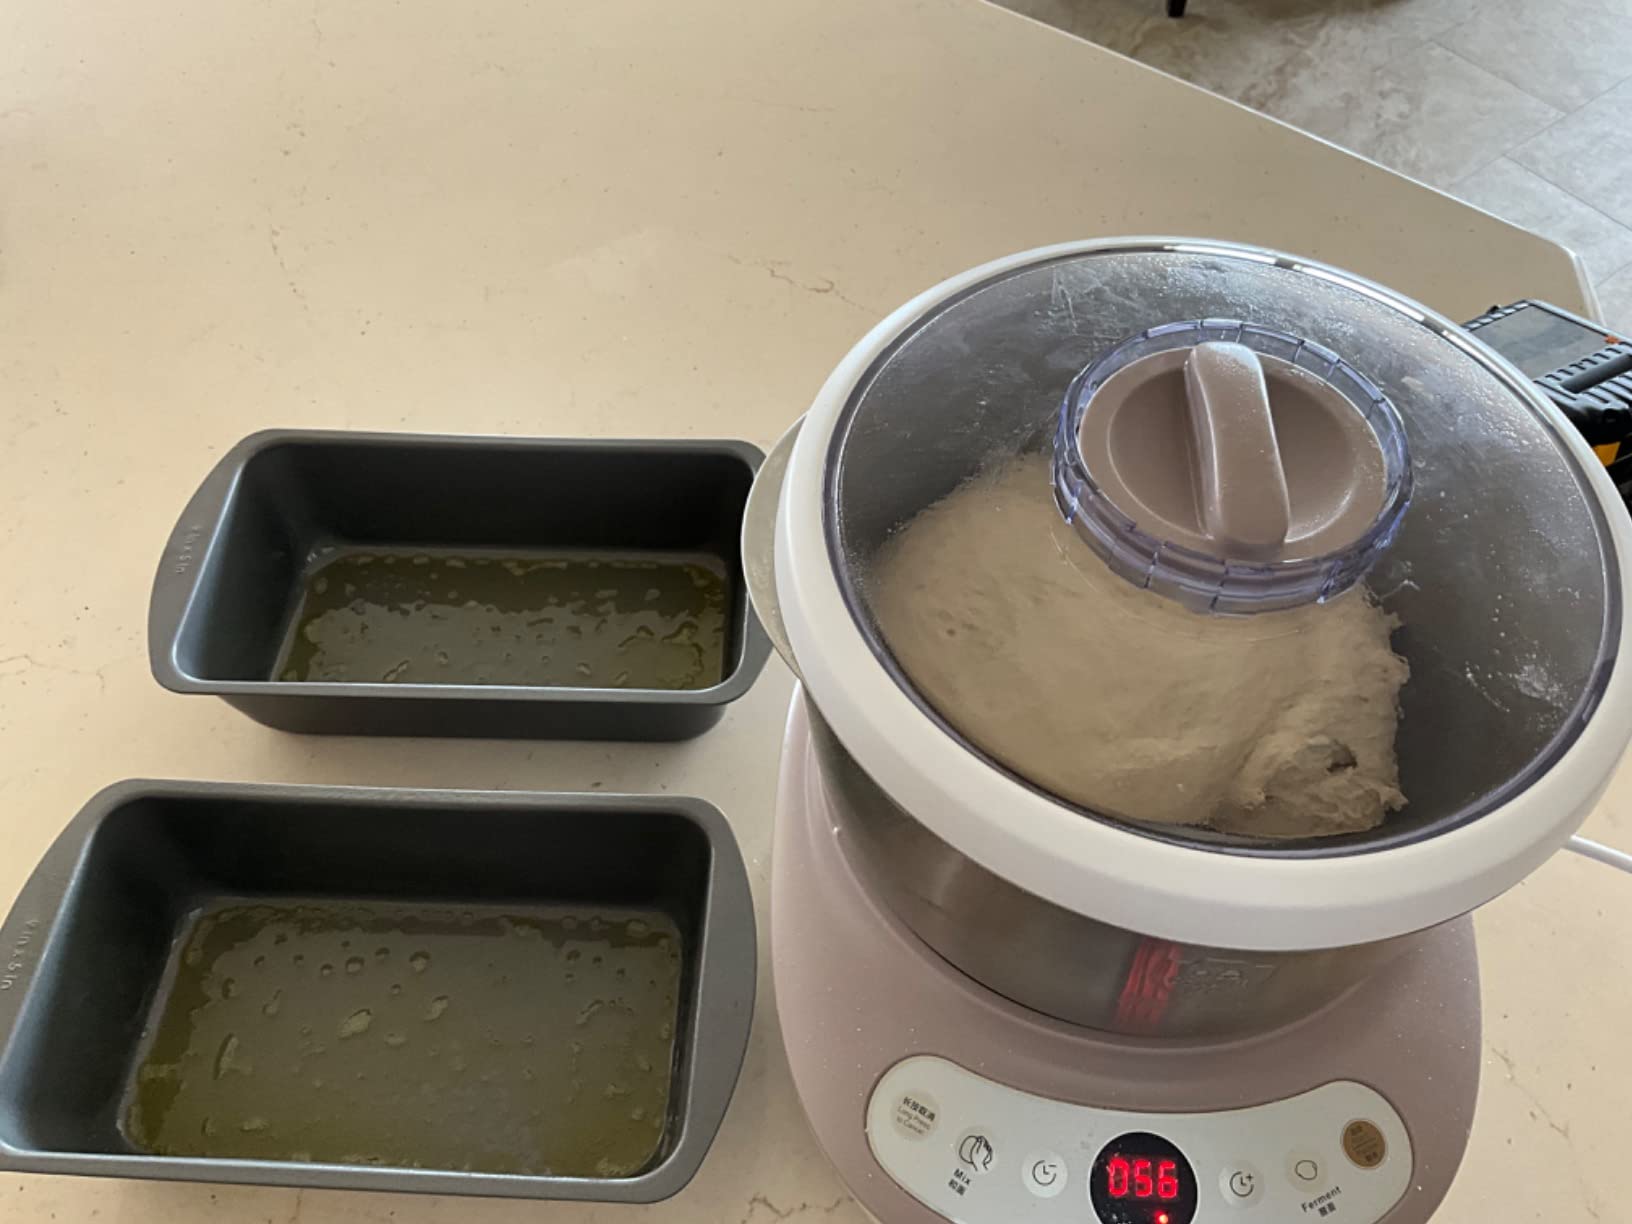
The first thing I noticed when I unboxed it was how lightweight it is compared to a bread machine. I’m not young anymore, and being able to lift it easily matters. The bowl is metal, not coated, and the paddle is solid stainless steel—much heavier and sturdier than what you get in a standard bread machine.
The bowl is also wider and shallower, which doesn’t sound like a big deal until you actually try removing a fully proofed dough. With my bread machine, getting dough out always felt awkward. With the Bear, it just lifts out cleanly.
I washed the bowl, paddle, and lid by hand (as recommended), plugged it in, and got started.
How It Actually Works in Daily Use
This machine is very straightforward, but it’s not fully automated like a bread machine. You decide how long to knead and how long to ferment.
Typically, my process looks like this:
-
Add liquids first, then dry ingredients
-
Set kneading for 15–25 minutes, depending on the dough
-
Set fermentation for 45–60 minutes
-
Let the machine switch automatically from kneading to proofing
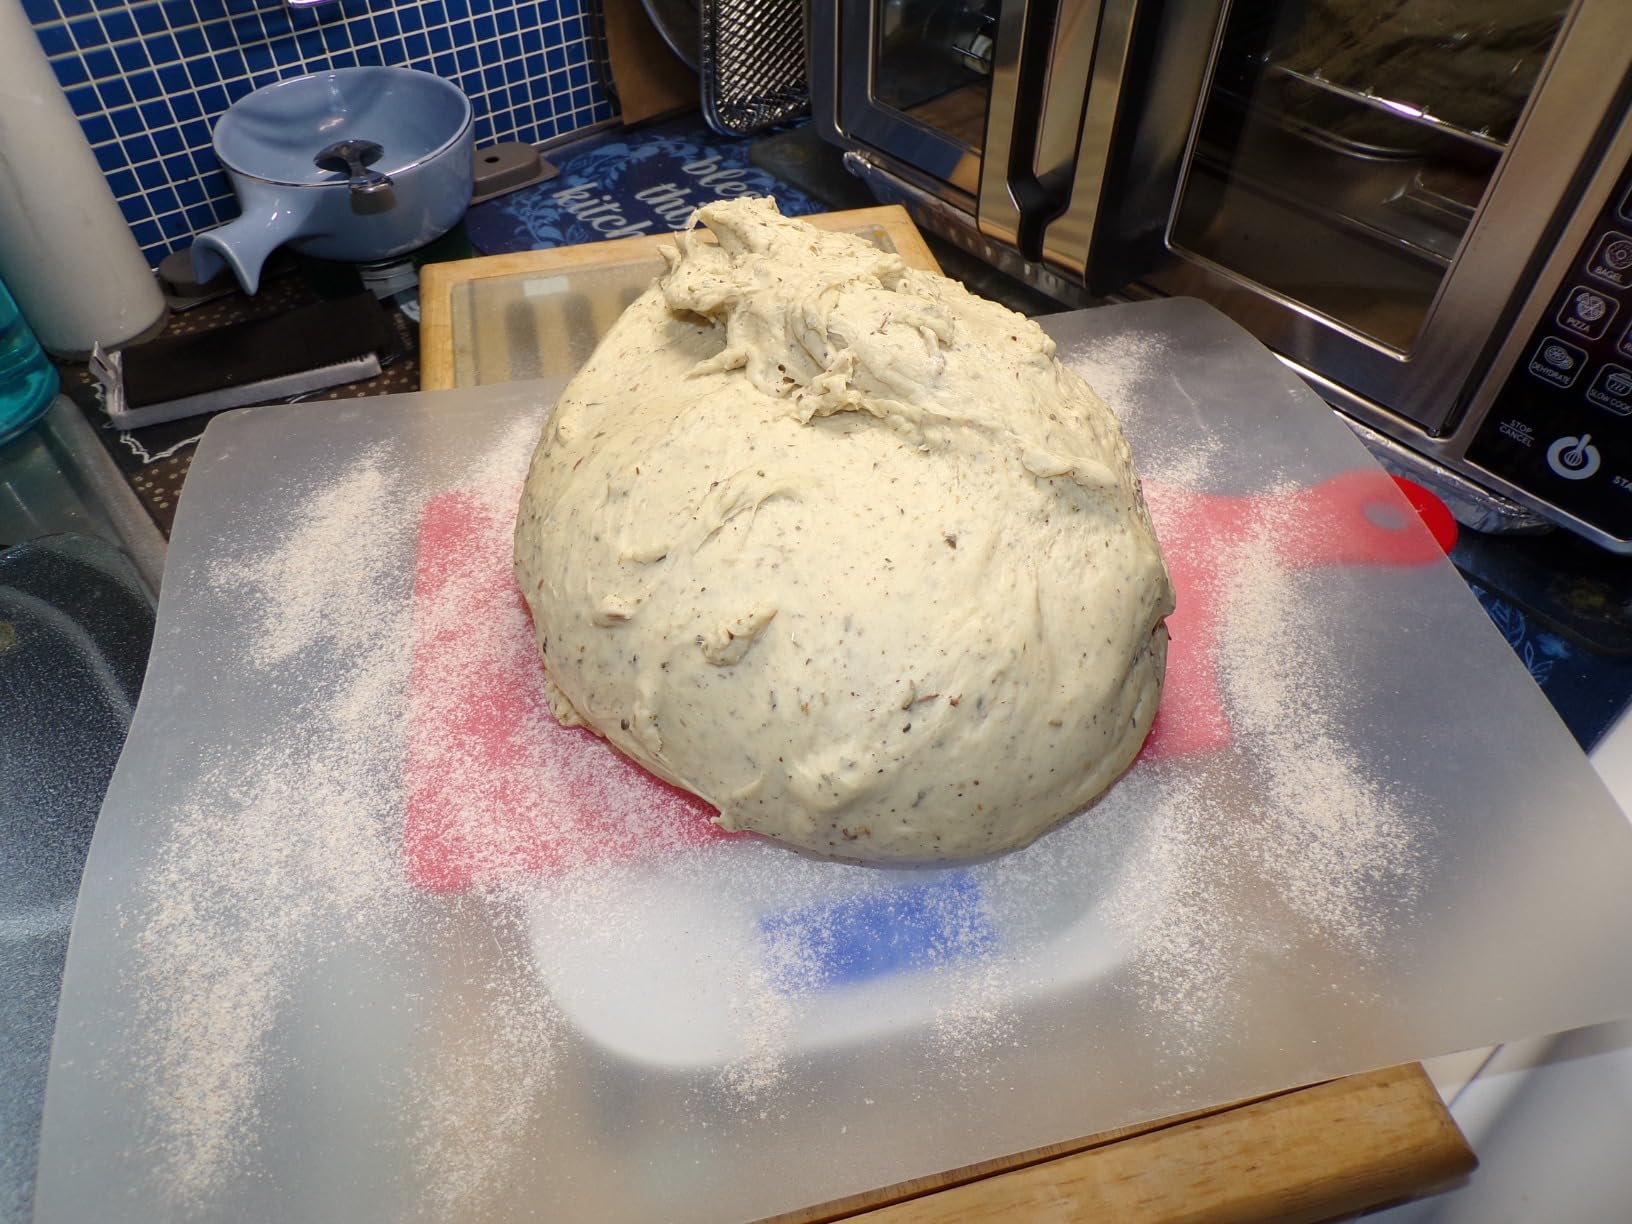
During kneading, the machine mixes from the bottom, stopping briefly every few seconds before continuing. At first, that pulsing motion felt odd, but over time I realized it actually develops dough very evenly. The gluten formation is noticeably better than what I used to get from my bread machine.
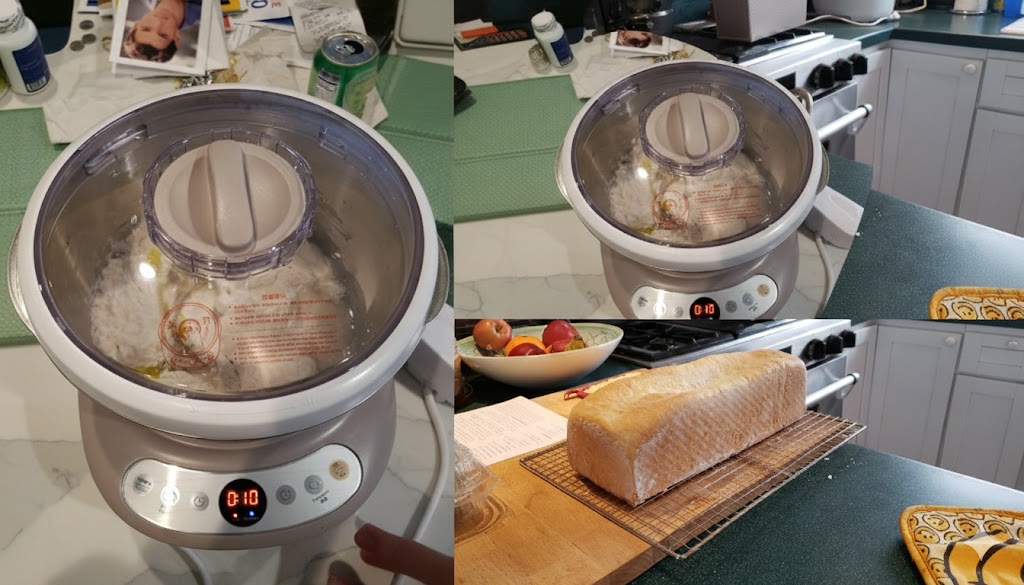
I usually watch the first couple of minutes. If it’s humid, I’ll add a bit more flour early on. If it’s dry, a splash of water. You do need to do this early—adding liquid later doesn’t work well—so I don’t walk away immediately.
Dough Quality: The Biggest Difference
This is where the Bear Dough Maker really shines.
With my bread machine, especially when using freshly milled wheat, the dough often felt slightly gritty or sandy. The bread tasted good, but the texture was never quite right.
With the Bear, the dough comes out:
-
Soft
-
Elastic
-
Very easy to shape
-
Cleanly pulled away from the bowl
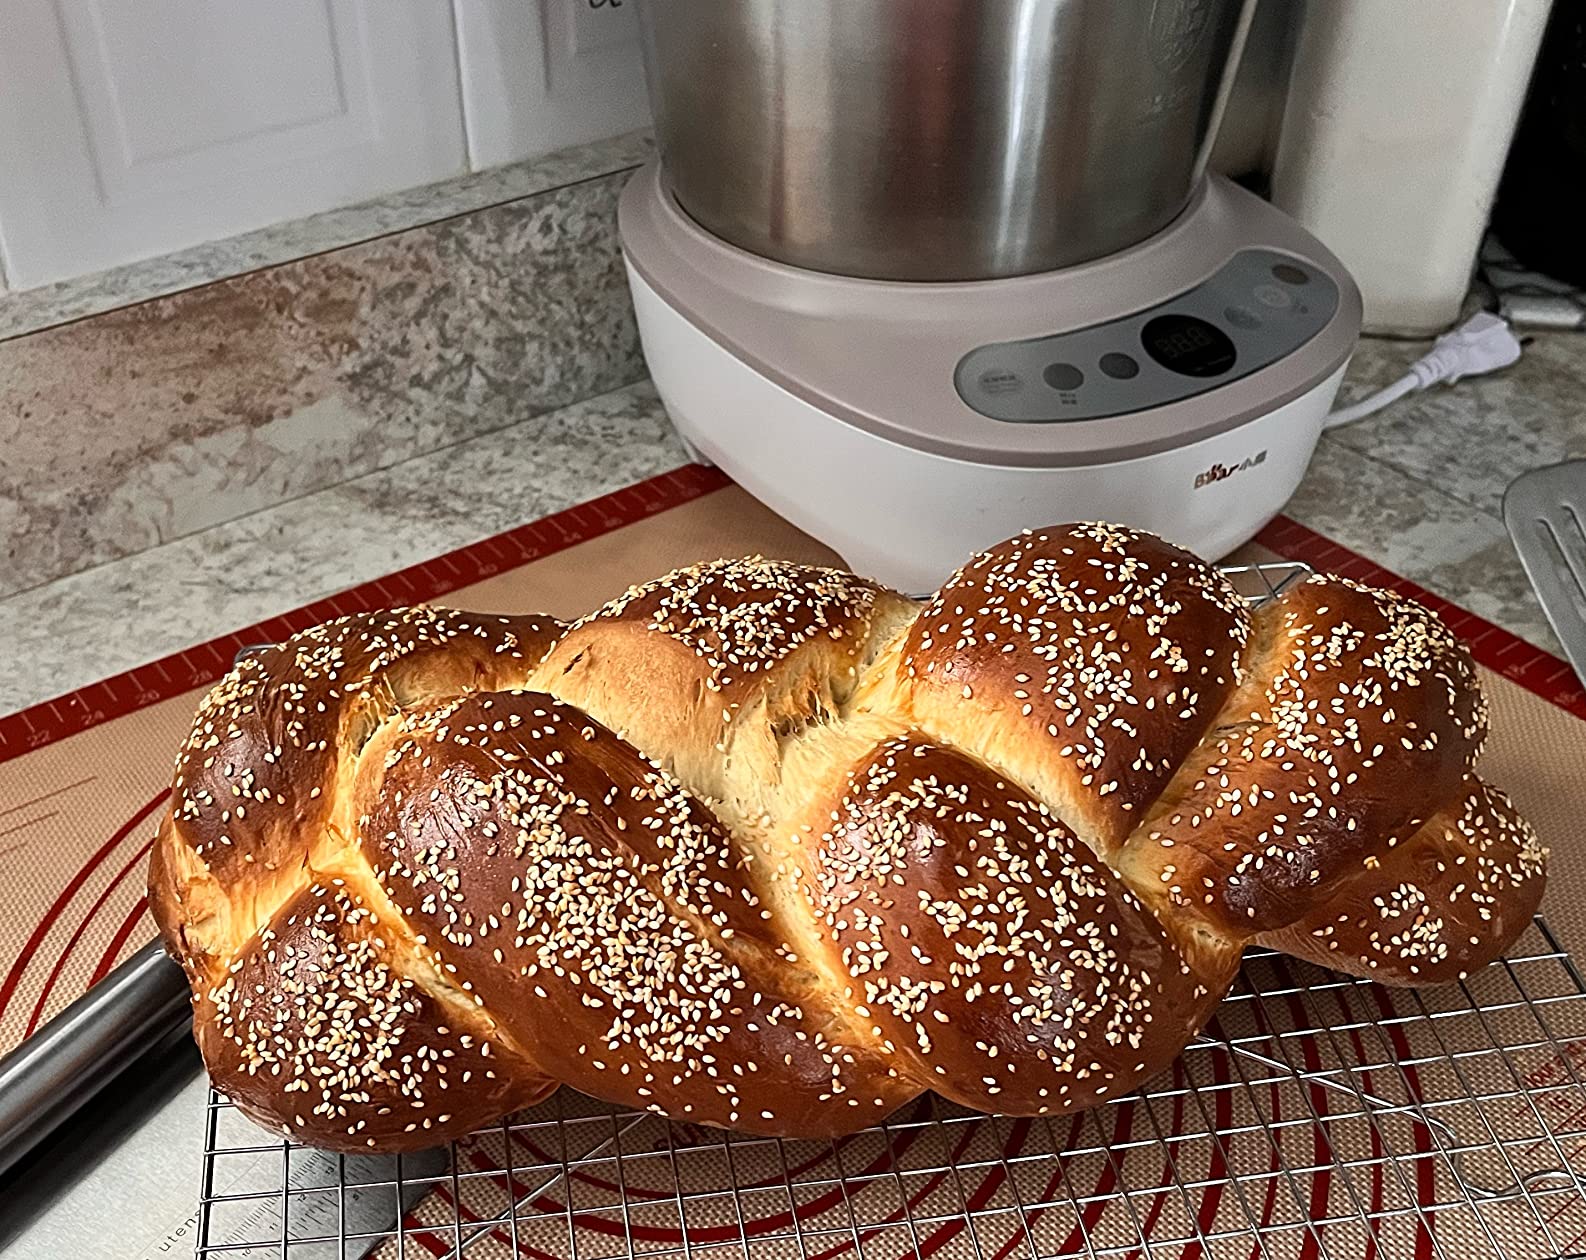
The difference was obvious the first time I made rolls. The crust turned out chewy, while the inside was moist and tender—much closer to bakery-quality bread than anything I’d made before with a bread machine.
I truly believe the larger, heavier paddle and stronger kneading action make a real difference.

Proofing (Fermentation) Experience
The fermentation function is one of my favorite features. The machine maintains a consistent, gentle temperature, which avoids the partially cooked or dried-out dough I sometimes got from bread machines.
Most of the time, my dough rises beautifully right in the bowl. In colder months, I occasionally skip the ferment function and move the bowl to a warm spot, but that’s more about my climate than the machine itself.
One tip I’ve adopted: before fermentation starts, I remove the paddle and lightly oil the dough. That way, when proofing is done, the dough lifts out cleanly without twisting around the blade.
Capacity: Why I Use It More Than Anything Else
What really made this machine replace my bread machine was batch size.
I regularly make:
-
Two full loaves at once
-
Large batches of rolls
-
Big pizza doughs
It handles it without sounding like it’s struggling. I never hear that stressed motor noise I used to get from my stand mixer.
That said, if you load it with a very large, heavy dough, you do need to make sure it’s on a stable surface. Once, when I pushed it to its limit, it felt a little top-heavy. Now I just make sure it’s placed securely, and it’s been fine.
Noise, Buttons, and Small Annoyances
It’s not silent. During mixing, there’s a noticeable hum and sometimes a high-pitched whine. It’s not worse than a stand mixer, and since kneading only lasts about 15 minutes, it doesn’t bother me much—even early in the morning.
The controls are touch-sensitive, not clicky buttons. They’re a bit too sensitive, honestly. I’ve accidentally triggered buttons just by brushing the panel or plugging it in carelessly. You get used to it, but physical buttons would be better.
The instructions are also pretty bad. If you’re new to dough terms like “ferment” or “proof,” you’ll probably feel lost. I strongly recommend watching a few videos online—that made everything click for me.
Cleaning and Storage
Cleanup is incredibly easy.
After dumping the dough:
-
I rinse the bowl and paddle
-
A quick wipe usually removes everything
-
No baked-on mess
-
No awkward crevices
Because it’s lighter and smaller, I actually keep it accessible instead of hiding it away. That alone has made me bake more often.
My KitchenAid? It’s honestly collecting dust unless I need to whip something. That says a lot.
What I Use It For Now
At this point, I use the Bear Dough Maker for:
-
Sandwich bread
-
Artisan loaves
-
Rolls and buns
-
Pizza dough
-
Dumplings and bao
-
Noodles (including ramen with kansui)
-
Cookie and dessert doughs (mixing only)
If it involves dough, this machine handles it.
Pros
-
Excellent dough quality – The kneading action develops gluten better than my old bread machine and even outperforms my KitchenAid for heavy doughs.
-
Handles large and double batches easily – I regularly make two full loaves or large pizza doughs in one go without stressing the motor.
-
Adjustable kneading and fermentation times – Being able to fine-tune both stages makes a huge difference for different types of dough.
-
Gentler, more consistent proofing temperature – Dough rises evenly without drying out or partially cooking.
-
Stainless steel paddle (no coating) – No flaking, no wearing down, and it feels built to last.
-
Wide, shallow metal bowl – Much easier to remove proofed dough compared to deep bread machine buckets.
-
Easy to monitor and tweak – Clear lid lets me watch the dough and add flour or ingredients early if needed.
-
Easy cleanup – A quick rinse and wipe is usually all it needs; no baked-on mess.
-
Lightweight and compact – I can lift it easily and it takes up far less space than a bread machine or stand mixer.
-
Reduces physical strain – Saves my hands, wrists, and shoulders from heavy kneading.
-
Encourages more baking – Because it’s easy and accessible, I make more types of dough than I used to.
Cons
-
It does NOT bake bread – This is strictly a dough mixer and fermenter; oven baking is required.
-
Instructions are poorly written – They’re confusing and not beginner-friendly; videos are almost necessary.
-
Touch-sensitive buttons are too sensitive – The panel can beep or activate accidentally, especially when plugging it in.
-
Can “walk” or feel unstable if overloaded – Large batches require a stable surface; suction cups don’t work well on all countertops.
-
Mixing noise can be high-pitched – Not unbearable, but noticeable, especially in quiet homes.
-
You need to watch the early kneading stage – Liquid or flour adjustments must be made early; late corrections don’t work well.
-
Fermentation heater durability is questionable – A small number of users (including myself noticing the risk) reported the proofing function failing over time.
-
Not fully automated – You must understand kneading and proofing times; no “set it and forget it” programs.
-
Pricey compared to used bread machines – If cost is your main concern, thrift-store bread machines may offer better value.
Final Thoughts: Bear Dough Maker Review
Yes — without hesitation.
Is it perfect? No.
Does it replace a bread machine if you want baked loaves? No.
But if you’re like me—someone who cares about dough quality, wants larger batches, easier cleanup, and less physical strain—the Bear Dough Maker is absolutely worth it.
It’s one of those machines I didn’t realize I needed until I used it. Now, I wouldn’t want to bake without it.
Leave a Reply