
I’ve always loved the smell of fresh bread, but baking by hand used to feel overwhelming—measuring, kneading, rising, baking—it’s a whole process. That’s why I finally invested in the KITCHENARM Bread Maker Machine, and after using it regularly, I can honestly say it’s been a game-changer in my kitchen. This review is based on my own experience, with a mix of things I loved, what I think could be improved, and even a couple of recipes I tried along the way.
KITCHENARM Bread Maker Machine – Summary Table
| Categories | Details |
| Key Features |
|
| Pros |
|
| Tips for Best Use |
|
| Best For | Beginners, busy families, and anyone who wants fresh homemade bread without the hassle of manual baking |
| How to buy? | CHECK PRICE ON AMAZON |
Key Features I’ve Noticed
The KITCHENARM isn’t flashy, but it packs in a ton of features that make bread-making simple and flexible:
-
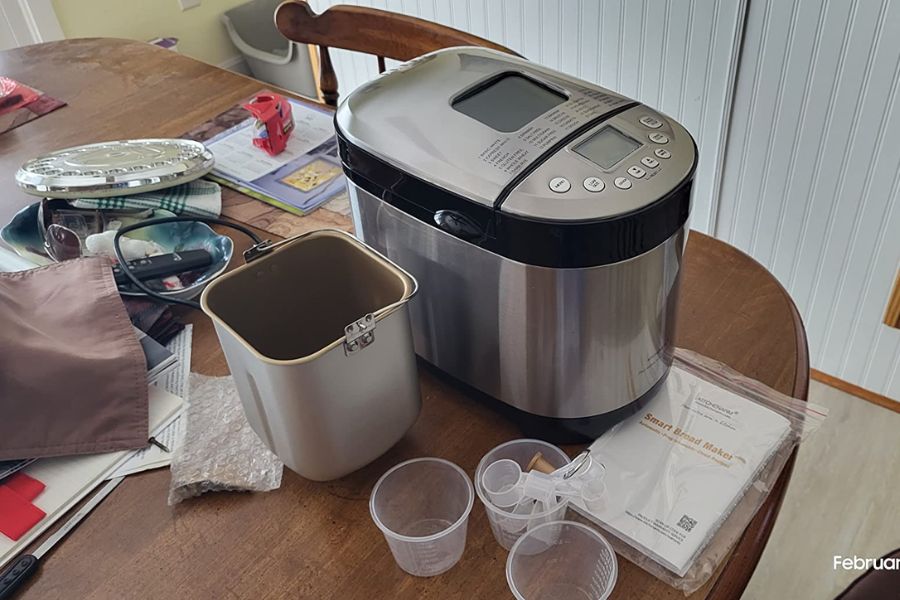
Menu Programs: It has settings for classic white bread, whole wheat, multigrain, French, gluten-free, quick breads, dough, and even cake. I’ve mostly used it for white and whole wheat, but the variety makes it great if you want to experiment.
-
Custom Options: You can choose different loaf sizes (from small to family-sized) and pick your crust shade—light, medium, or dark. I usually stick with medium, and the golden color looks like something from a bakery.
-
Delay Timer & Keep Warm: Probably my favorite feature. I can set everything up before bed and wake up to a warm, freshly baked loaf. It also keeps the bread warm if I don’t grab it right away.
-
Even Baking & Texture: Every loaf I’ve made so far has been evenly baked—soft and fluffy inside, with a crust that isn’t too hard.
-
Ease of Use: The buttons are clearly labeled, and I didn’t feel like I had to constantly check the manual. Even if you’re a total beginner, you’ll be able to figure it out quickly.
-
Compact but Functional Design: It doesn’t hog counter space, which is a big deal in my small kitchen. Despite its size, it makes loaves large enough to feed my family for a couple of days.
What I Loved (Pros)
One of the first things I noticed about the KITCHENARM Bread Maker Machine is how approachable it feels. Even as someone who isn’t a professional baker, I didn’t feel intimidated at all when I first set it up.
The buttons are clear, the programs make sense, and it really takes the guesswork out of bread making. After a few loaves, I started to trust that it would just do its job without me hovering over it. I also like that it doesn’t take up my entire counter, yet still manages to bake loaves big enough for everyone in my family.

And while it’s definitely a machine, there’s still something satisfying about lifting the lid and smelling fresh bread that you know came from your own kitchen. Those small moments really made me appreciate it more. Here are the things that stood out the most for me:
- Beginner-Friendly: I felt comfortable using it right out of the box. No steep learning curve.
- Consistent Results: Loaves come out with a reliable texture and taste, no matter which program I try.
- Recipe Flexibility: It handles both the included recipes and the ones I found online. I even swapped ingredients (like using honey instead of sugar), and it worked great.
- Time-Saving: It’s the ultimate set-and-forget machine. Once ingredients are in, it takes care of everything.
- Good Value: For the performance and build quality, I feel like it’s priced really fairly.
- Compact but Capable: It doesn’t dominate my counter, but the loaves are plenty big for a family of four.

Things That Could Be Better (Cons)
As much as I’ve enjoyed using the KITCHENARM Bread Maker Machine, it’s not without its little quirks. Nothing deal-breaking, but just the kind of things you notice once you’ve baked a few loaves. Some recipes from the included book needed a bit of adjusting before they really worked for me, and I did spend some time figuring out the right ingredient balance.
The machine also makes a bit of noise when kneading, and the loaves come out with that typical bread machine shape—not bad at all, just different from bakery loaves.
-
Recipe Limitations: The included recipe book is good, but not all of them were perfect on the first try. For example, the gluten-free bread needed a little tweaking.
-
Learning Curve: While easy overall, I did have to experiment with ingredient ratios before getting consistently great results.
-
Noise & Vibration: When kneading, the machine makes a noticeable noise and sometimes vibrates a little on the counter. Not terrible, but something to be aware of.
-
Loaf Shape: Like most bread machines, the loaves don’t look exactly like bakery bread. They’re more rectangular and a little “homey” looking, but honestly, the taste more than makes up for it.

Recipes I Tried
The included recipe book was a good starting point, but I found the whole wheat bread a little dense at first. After experimenting with the flour ratios and adding honey instead of sugar, the loaf turned out perfect—moist, hearty, and great for sandwiches. I think part of the fun is learning how to tweak recipes to your own taste. To give you an idea, I’ll share some of the recipes I tried right below.
Classic White Bread
- 1 cup warm water
- 2 ½ cups bread flour
- 1 tbsp sugar
- 1 tsp salt
- 1 tbsp butter
- 1 ½ tsp yeast
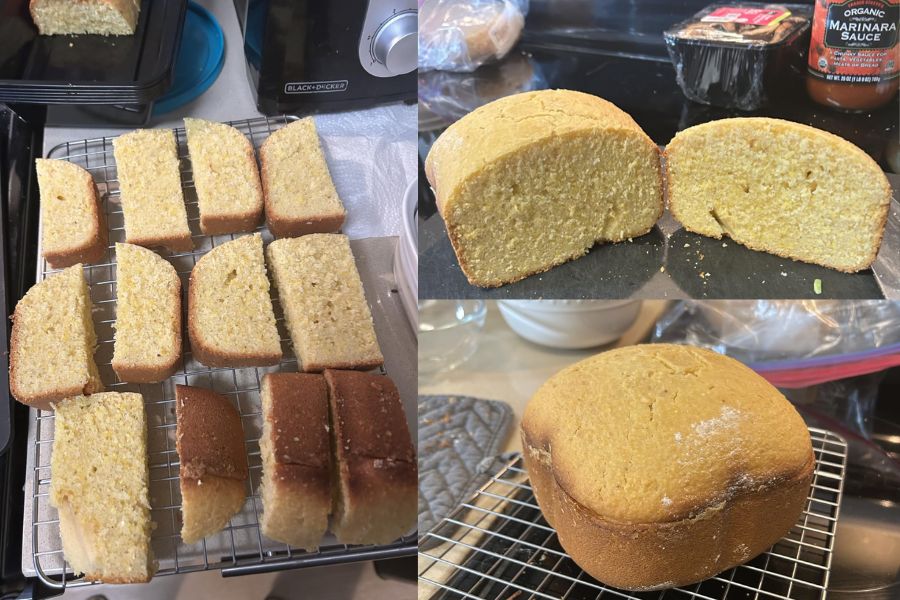
This one turned out amazing—soft, fluffy, with a perfectly browned medium crust. It tasted like the fresh loaves I used to buy at bakeries.
Whole Wheat Bread
- 1 ½ cups warm water
- 2 cups whole wheat flour
- 1 cup bread flour
- 2 tbsp honey
- 1 tbsp olive oil
- 1 ½ tsp salt
- 2 tsp yeast
This one was denser but still moist. Great for sandwiches, especially when lightly toasted.
Gluten-Free Bread (Tweaked)
- 1 ½ cups warm milk (I used almond milk)
- 3 cups gluten-free flour blend
- 2 tbsp sugar
- 1 ½ tsp salt
- 2 tbsp olive oil
- 2 tsp yeast
The first attempt was a little heavy, so I added an extra tablespoon of oil and an extra teaspoon of yeast the second time, and it came out much better. Still not perfect, but definitely edible and tasty.

Tips I Learned Along the Way
I won’t lie, my first few tries with this bread maker weren’t perfect. But after a bit of trial and error, I started to figure out some little things that made the process smoother and the bread come out better. Nothing complicated—just small habits that made a big difference. Here are a few tips I learned along the way:
- Follow Recipes at First: Use the included book until you understand how the machine works, then branch out.
- Measure Carefully: A tiny bit more or less flour/yeast changes the bread’s texture a lot.
- Check the Dough: During the first kneading cycle, peek inside. If it’s too sticky, add flour. If too dry, add water.
- Play with Settings: Try all three crust options to see what you like best. I didn’t realize how much I’d enjoy the “dark” crust until I tried it.
- Use Delay Timer Wisely: It’s amazing for overnight bread, but don’t use perishable add-ins like fresh fruit if you’re setting it for hours ahead.

Overall, the KITCHENARM Bread Maker Machine has been a fantastic addition to my kitchen. It’s simple enough for beginners, flexible enough for experimenting, and reliable in its results. Yes, you might deal with a little noise and you’ll need to experiment with recipes, but once you get the hang of it, you’ll have bakery-quality bread at home without the effort.
For me, the convenience of fresh bread on demand—and the fun of trying new recipes—makes this machine absolutely worth it. If you’ve been on the fence, I’d say go for it. Your kitchen (and your taste buds) will thank you.


Leave a Reply